
In my previous post I showed how to use Visual Studio 2015 to author a simple Azure Resource Manager (ARM) template from scratch. In this post, I will discuss a few options for deploying that template. Specifically, I will show how to
- deploy using Azure PowerShell
- deploy using Azure Command-line Interface (CLI)
- deploy using Visual Studio
- deploy using the Azure Portal
If you want to get hands-on with the techniques described in this post then use the solution I walked through in the last post. A copy of that solution is available on my GitHub account.
Deploy using Azure PowerShell
This is the most obvious and preferred method if you or the person deploying your template is a Microsoft Windows user. All you need on your machine is PowerShell 3.0 or newer and a couple Azure “RM” PowerShell Cmdlets. For this post, I have the following versions installed.
- PowerShell v5.0.10586.122
- AzureRM.Resources v1.05
If you already have PowerShell and the Azure “RM” PowerShell cmdlets installed, then feel free to skip the next section. If you do not or are not sure then continue.
Setup Azure PowerShell
If you don’t have Azure PowerShell installed, then you can install the latest from here.
To see what version of PowerShell you have installed, open a PowerShell console prompt and type $PSVersoinTable.PSVersion.
1
2
3
4
PS C:\> $PSVersionTable.PSVersion
Major Minor Build Revision
—– —– —– ——–
5 0 10586 122
To see what version of Azure “RM” PowerShell Modules (cmdlets) you have installed use Get-Module as shown below.
1
2
3
4
5
6
7
8
9
10
11
12
PS C:\> Get-Module -ListAvailable | Where-Object { $_.Name -like "AzureRM*" } | Select Name, Version

Name                        Version
----                        -------
AzureRM.ApiManagement       1.0.5
AzureRM.Automation          1.0.5
AzureRM.AzureStackAdmin     0.9.2
<... abbreviated ... >
AzureRM.Resources           1.0.5
AzureRM.SiteRecovery        1.1.4
<... abbreviated ... >
AzureRM.Websites            1.0.5
You will also need to configure PowerShell’s execution policy on your machine to allow you to execute scripts. To do that, use the Set-ExecutionPolicy command as shown here.
PS C:\> Set-ExecutionPolicy -ExecutionPolicy RemoteSigned -Force
Note: To set the execution policy you will need to be running your PowerShell command prompt (or PowerShell ISE) as an administrator. Setting the execution policy is a one-time step and does not need to be repeated.
Deploy the ARM Template
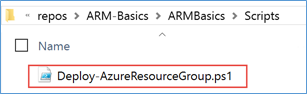
Recall from the last post that Visual Studio created a deployment script for me titled Deploy-AzureResourceGroup.ps1. It is located in the Scripts folder of the project as shown here.
So, the easiest method to deploy the template is to simply just invoke this script to do the work. However, before you can invoke the script you must first authenticate to your Azure subscription.
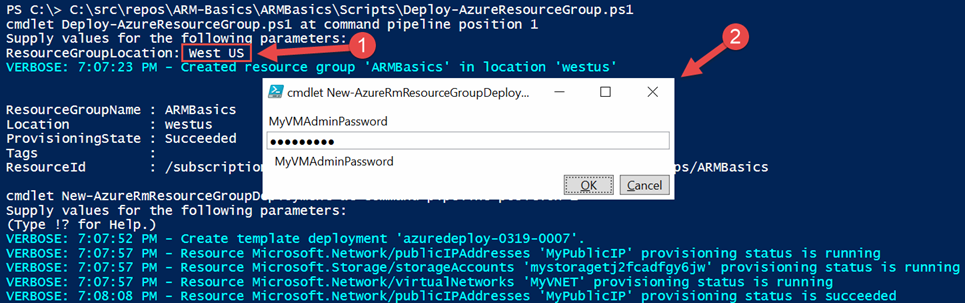
I’m going to use PowerShell ISE (powershell_ise.exe) for this and open Deploy-AzureResourceGroup.ps1. The upper window in PowerShell ISE is the script pane and the lower (blue) window is the console pane. In the console pane invoke the Login-AzureRmAccount command to authenticate to your Azure subscription. After successfully authenticating click the play button in the toolbar (or press F5) to run the script in the script pane as shown here.

When you run this script you will be prompted for mandatory parameters of the script, in this case, the ResourceGroupLocation parameter for which I supplied the value “West US” (without quotes). You will also be prompted (in a dialog window) for the virtual machine admin password you want to use when connecting to the VM using RDP.
Note: The admin password is a parameter that the template expects. The ResourceGroupLocation parameter is a parameter that the Deploy-AzureResourceGroup.ps1 script expects.
After providing the necessary parameters the resources will proceed to be provisioned as shown below.
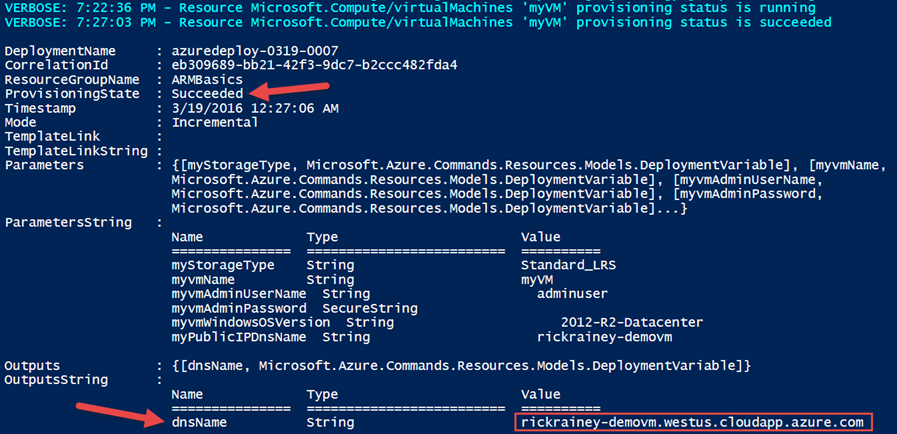
After a few minutes the deployment will be completed. A successful deployment will look similar to what is shown below where the ProvisioningState is reported as Succeeded. Also notice that in the Outputs section the FQDN of the VM, which can be used to connect to the VM using RDP.
Deploy using the Azure Command-Line Interface (CLI)
The Azure CLI tools provide cross-platform support for managing your Azure resources. So, if you or the person deploying your template is running Max (OS X) or Linux then Azure CLI can be used to complete the task. The Azure CLI tools also are available on the Windows platform.
If you already have the Azure CLI installed, then feel free to skip the next section. If you do not or are not sure then continue.
Setup Azure CLI
If you don’t have the Azure CLI installed, then you can install it using the Windows Installer, OS X Installer or Linux Installer.
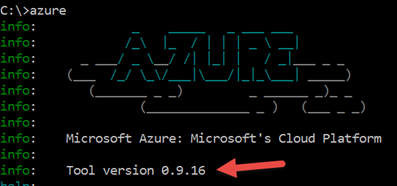
To see what version of Azure CLI you have installed, open a command prompt, type azure, and press ENTER.
Deploy the ARM Template
The deployment experience using Azure CLI is very similar to the deployment experience using PowerShell as described above. However, there are a few subtle differences that I will call out in this section.
To deploy the template using Azure CLI, start by opening a command prompt (if you’re on windows). Or a terminal session on Mac or Linux.
Just as before in the PowerShell scenario, you must authenticate to Azure first before you can deploy your template. To authenticate using Azure CLI, type azure login and press ENTER. The authentication experience will require you to open a browser to https://aks.ms/devicelogin and enter a code (provided by the CLI) as shown below. Afterwards, you will be able to authenticate to Azure using your normal Azure subscription credentials.

Next, you must switch your CLI session to use Azure Resource Manager. At the time of this writing, it defaults to the Azure Service Management (ASM) mode. To switch to ARM mode, type azure config mode arm and press ENTER as shown here.

Azure CLI does not prompt for missing/mandatory parameters like PowerShell does so you have to specify all your parameters when you invoke the command to start the deployment. You can provide all the parameters inline on the command line or using a parameters file. However, you cannot use a combination of these. It must be one or the other. Since we already have a parameters file in this scenario, we will go with the latter. However, the azuredeploy.parameters.json file does not provide the admin password for the VM that the template expects. So, before proceeding, update the azuredeploy.parameters.json file to include this parameter value as shown here.
1
2
3
4
5
6
7
8
9
10
11
12
13
14
15
16
17
18
19
20
21
{
  "$schema": "https://schema.management.azure.com/schemas/2015-01-01/deploymentParameters.json#",
  "contentVersion": "1.0.0.0",
  "parameters": {
    "MyVMName": {
      "value": "myVM"
    },
    "MyVMAdminUserName": {
      "value": "adminuser"
    },
    "MyPublicIPDnsName": {
      "value": "rickrainey-demovm"
    },
    "MyStorageType": {
      "value": "Standard_LRS"
    },
    "MyVMAdminPassword": {
      "value": "P@ssword1"
    }
  }
}
With that change in place, the parameters file provides all the parameters necessary to deploy the template using Azure CLI.
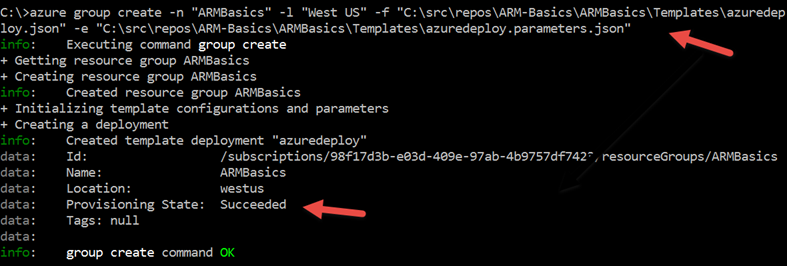
To create the resource group called “ARMBasics” and deploy the template using the parameter values in the parameters file, type azure group create -n “ARMBasics” -l “West US” -f “<path to template file>\azuredeploy.json” -e “<path to template parameters file>\azuredeploy.parameters.json” and press ENTER as shown here. After a few minutes the resources described in the template file will be provisioned in the resource group. And just like in the PowerShell scenario, a successful deployment will show Succeeded for the ProvisioningState.
Deploy using Visual Studio
If you used Visual Studio to author your template, then it is convenient to just deploy directly from Visual Studio. I do this when I am testing things out. However, once I am finished I prefer to just use the PowerShell and CLI methods as described above.
When you deploy using Visual Studio, it simply invokes the same script, .Scripts\Deploy-AzureResourceGroup.ps1, which was shown in the Deploy using PowerShell section. So, there’s nothing particularly magical that Visual Studio is doing for you here except giving you a nice UI experience to invoke the script and provide some parameter values. I’ll come back to this later in this section.
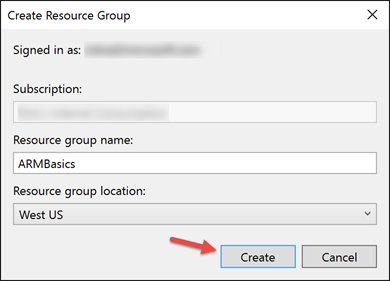
To use Visual Studio to deploy the ARM template, open the “ARMBasics” solution created using Visual Studio in the last post. From the main menu, select Project > Deploy > New Deployment. In the dialog that opens, select <create new> for the Resource group field, which will cause another window to open where you can specify the name and location of your resource group as shown below. When finished click Create.
At this stage, an empty resource group is created in the selected region using the given name and you are returned back to the previous dialog as shown below. The Deployment template and Template parameters file fields are defaulted to the only values available. However, in more complex templates, you may have multiple deployment templates and you most certainly would have multiple template parameter files to feed different parameter values to different deployment environments (ie: DevTest, Staging, Production, etc.).

The dialog also gives you an opportunity to edit the template parameter values directly by pressing the Edit Parameters button. Doing so will open a new dialog where you can specify the values for each parameter of your template as shown here.

After setting the parameter values to your liking, click the Save button to save the values. The parameter values you specify are stored in the .\Templates\azuredeploy.parameters.json file.
Note: Generally, you don’t want to store passwords in your template parameters file which is why it was left null in the image above. If you do want to save your password to the parameters file, then type it in and make sure you check the Save passwords checkbox. Otherwise, Visual Studio will prompt you for the password again when you deploy the template.
After setting your parameter values you are returned back to the previous dialog. Click the Deploy button to start the deployment. At this time, you will be prompted to enter the password if you didn’t do so in the Edit Parameters dialog shown above.
The deployment progress is displayed in the Output window as shown below. If you don’t see it your environment, then from the main menu select View > Output. Coming back to the statement earlier in this section about Visual Studio just invoking the Deploy-AzureResourceGroup.ps1 script to deploy the template, this is evident in the Output window of the deployment as shown here.

The rest of the deployment is shown in the Output window as the deployment progresses as shown here.

The deployment will take a few minutes to fully complete.
Deploy using the Azure portal
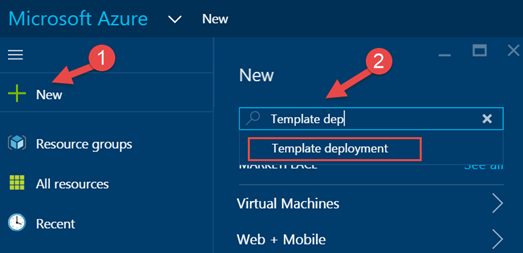
You can deploy your template using the Azure Portal. In fact, you can even edit your template directly in the portal. This is handy in situations where you want to test something out with just a browser. In this scenario, all you need is the template file. In the portal click +New and search for “Template deployment” as shown here.
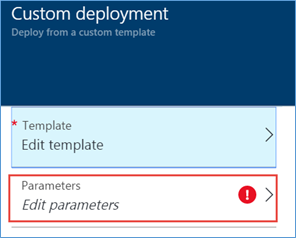
In the search results blade select Template deployment. In the Template deployment blade click Create. This will open the Custom deployment blade where you can edit the template, provide parameters, specify the resource group name, and location. Click on the Edit template option as shown here.

In the Edit template blade replace the text with the text from the * .\Scripts\azuredeploy.json file and click Save as shown here.

In the Custom deployment blade, click the Edit parameters option as shown here.
In the Parameters blade specify the values for each of the parameters the deployment template expects and then click OK as shown here.

In the Custom deployment blade set Resource group to +New and specify a name for the resource group. Next, select a location for the deployment, review the legal terms and click Create as shown here.

After a few minutes the resources described in the template will be provisioned using the parameter values specified above and the Resource group blade in the portal will show all the resources in the group.

Summary
This post demonstrated techniques for deploying an ARM template. The first technique used Azure PowerShell to invoke the deployment script, Deploy-AzureResourceGroup.ps1, that Visual Studio created when the resource group project was created in the last post. Next, I showed how to use the Azure Command-Line Interface (CLI) tools to deploy the template file, azuredeploy.json, using parameter values from the template parameters file, azuredeploy.parameters.json. In the Azure CLI case, the deployment script is not used – just the template and template parameters file. Next, I showed how to deploy directly from Visual Studio and pointed out that doing so performs the exact same steps as shown in the Azure PowerShell case, but with some added UI features from Visual Studio to capture parameter values. Finally, I showed you how you can deploy a template using only your browser by leveraging the Template deployment feature in the Azure portal.
Comments powered by Disqus.