
If you’re an enterprise developer targeting Microsoft Azure for a new Line-of-Business (LOB) application, then you will most likely be building your application to authenticate users using Azure Active Directory. Azure Active Directory (Azure AD) is Microsoft’s service that provides identity and access capabilities in the cloud. It can be used to authenticate users of cloud applications or users running modern LOB applications on-premises that may be leveraging Azure services behind the scenes.
In this post, I’m going to demonstrate how to use Azure Active Directory and Visual Studio 2013 to build a web application that authenticates users using their Organizational Account (an account that has been created by an organization’s administrator for a user in the organization). Along the way, I will draw attention to some important details you need to be aware of to be successful in this scenario. I will also provide some background on how Visual Studio does some of its magic to make this a rather low-friction experience.
To start, I’m going to use an Azure Subscription that is sourced from a Microsoft Account (rather than an Organization Account). I’m choosing this because it’s the situation I find many developers (including myself) starting from that just want to learn how to build an application that will use Organization Accounts for authentication, without actually using an Azure organizational subscription that you may not have access to.
Adding users to Azure Active Directory
First, I added two users to my Azure Active Directory.
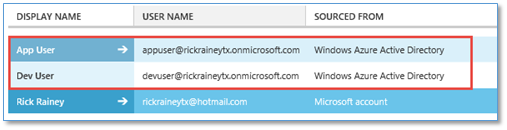
App User is just your typical user in the directory and doesn’t require any explanation.
Dev User is a user that would be representative of typical developer in an organization. That would be you (if you’re reading this blog). What makes this user unique are two things:
Dev User is a Global Administrator in the Azure Active Directory. This is because Dev User will be building an application that will be registered in Azure AD and therefore will need rights to configure the directory for the application.
Dev User is a Co-Administrator on the Azure Subscription. This is because Dev User will be building an application that will be using Azure and therefore will need rights to provision services (Azure Websites, SQL Databases, etc.) in the Azure Subscription.
The 3rd user (myself) is the Microsoft Account associated with my Azure Subscription. This user is added automatically and cannot be removed.
Create an MCC Web Application
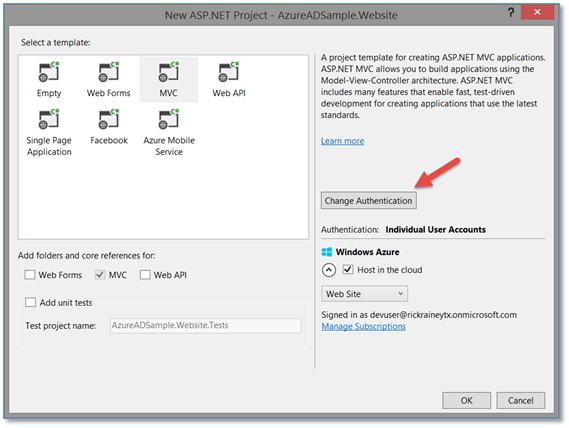
The point of this blog is not to create a fancy web site, so I’m going to just use the MVC default template to get something up and working. From the main menu, simply select FILE -> New -> Project and select the ASP.NET Web Application template.
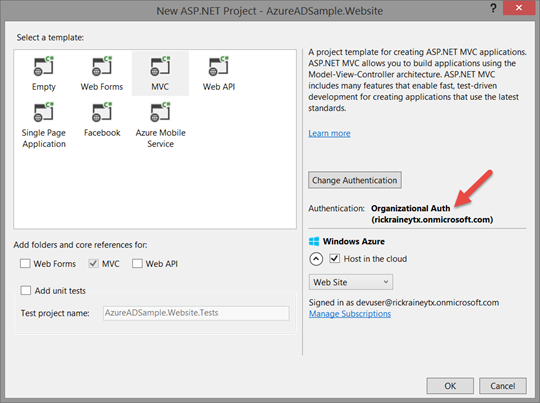
In the New ASP.NET Project wizard is where you will find your opportunity to change the authentication type for your application. It defaults to Individual User Accounts (think Facebook, Twitter, Username/Password, etc.). By clicking on the Change Authentication button, you can choose other options for authentication.
In this case, I’m going with Organizational Accounts. When you choose this option, you also have to indicate the domain (your Azure AD) for your application.
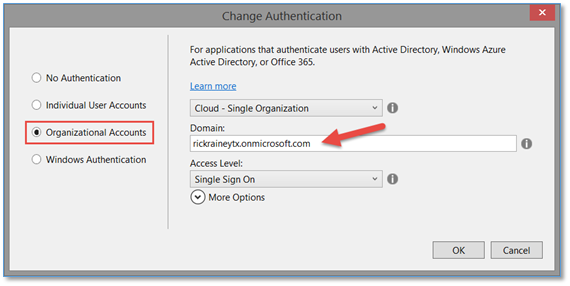
Of course, just providing the name of the domain is not sufficient. Visual Studio will challenge you to sign-in so it can verify you have access to this domain and rights to configure it. Why? Because it’s about to provision the application for you in your Azure AD. Signing in as Dev User (a Global Administrator in my directory) will satisfy this challenge.
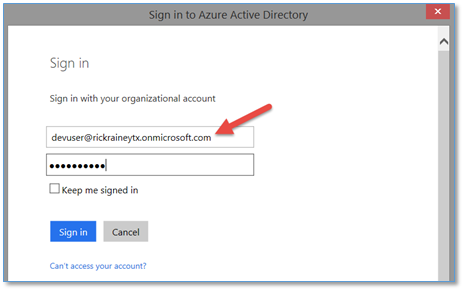
After successfully authenticating, you’re returned back to the New ASP.NET Project wizard screen with the authentication type changed to Organizational Auth. Clicking on the OK button here completes the steps needed to create the web application and then transitions into the next part – configuring the Azure Website in Microsoft Azure.
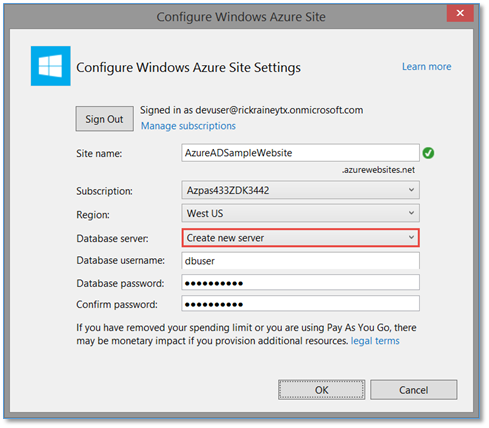
Create the Azure Website and SQL Database
The next dialog is all about configuring the Azure Website in Microsoft Azure. So, selecting a globally unique name (for DNS) and indicating the region you want to run in are part of this experience. Notice also that I indicated to create a new database server (SQL Database). This is a very important step in this process. It’s not necessarily because I want a database for my web site. No, this is actually needed to support the Organizational Account authentication type I selected previously. Without a database, the startup code for the web site won’t be able to locate the information it needs to initialize the Windows Identity Foundation (WIF) modules so WIF can properly validate authentication tokens issued from my Azure AD tenant. The information (a signature) to properly identify the Azure AD tenant this application trusts for authentication is put into the SQL Database as an automation step for you. I’ll talk a lot more about this database dependency in my next blog post. For now, just know that for this application to work when publishing it to Azure, the MVC project template injects code in your solution that is expecting a database to retrieve these values from.
At this point, Visual Studio has its marching orders and is ready to go into action as soon as you click the OK button. When you do, here is what you will get in return:
The Microsoft Azure Website
Visual Studio created the Microsoft Azure Website in Azure. Note, it did not publish the site, it just created it. So, if you tried to browse to its URL you would just get the standard empty web site page.

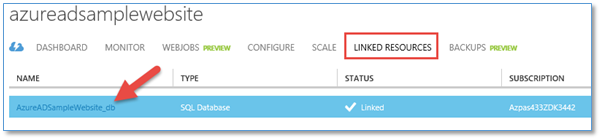
The Microsoft Azure SQL Database
The SQL Database (and server in this case) was created and linked to the Azure Website above. While the SQL Database is initially created to support my decision for Organization Account authentication, there’s nothing to stop me from using this database for other data needs in my application. Having this created as a linked resource for my Website is a nice benefit.
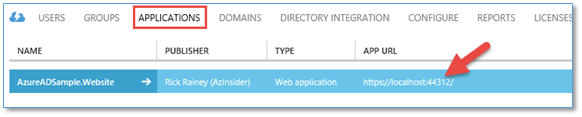
The application (for localhost) registered in Azure AD
An application was added to my Azure AD. There is quite a bit of automation that took place here and if you have a general understanding of the WS-Federation protocol and how Windows Identity Foundation works, then you can really start to appreciate what is going on here to setup authentication for organizational accounts. Looking in the APPLICATIONS tab for your Azure AD, you will see what I call the “local” version of the application. Meaning, this application and all of its configuration is in place to support you running your MVC application on localhost while developing the app.
Press F5 to run your application locally and sign-in using the credentials of an organizational user (such as App User in my example), and the page loads as expected. Beautiful!
Publish the application to Azure
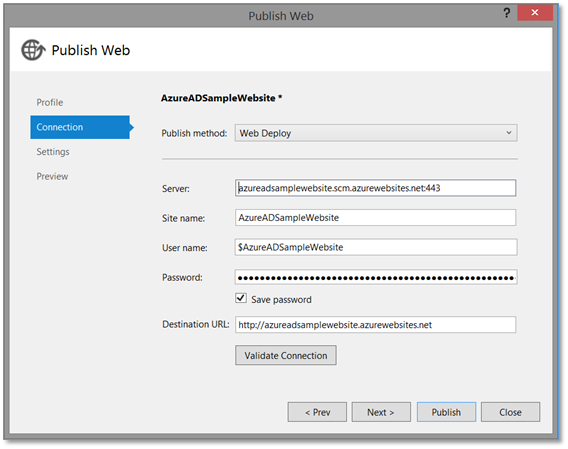
Now, let’s fast-forward and assume you’re ready to publish your application to your Azure Website and run this in the cloud. That is a simple process to kick off. Simply right-click on your project in Visual Studio and select Publish. Visual Studio will launch the Publish Web dialog as you see here and this first screen can typically be left alone. Click on the Next button to get to the important stuff.
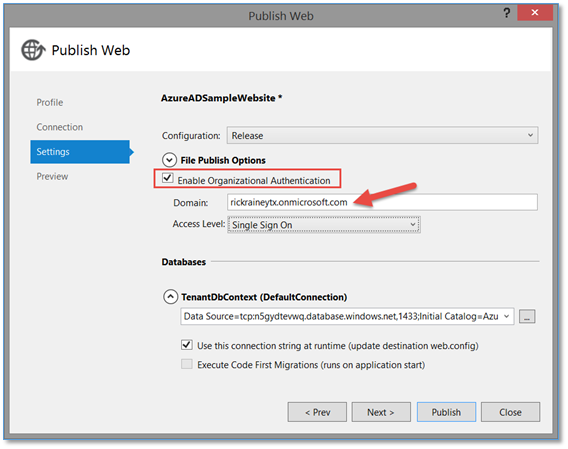
On the Settings page of the dialog, you must check the checkbox to Enable Organizational Authentication. When you do this, you will then be prompted to enter your domain (Azure AD) just as before. The other thing to note on this screen is the Databases section. Notice it is referencing the SQL Database in Azure that was created previously. The connection string in the web.config will be updated in Azure (not locally) to read the settings I mentioned earlier from the SQL Database. Again, more on this in my next post.
When you click the Publish button, the MVC application will be published to your Azure Website as expected. Also, an additional application is registered in your Azure Active Directory during this step. Let’s review.
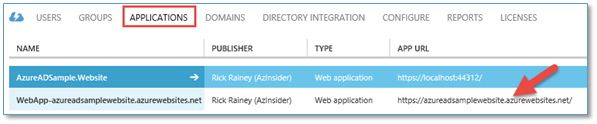
The application (for .azurewebsites.net) registered in Azure AD
The first time you publish the application to Azure Websites, Visual Studio will register what I call the cloud version of the application. Meaning, this application and all of its configuration is in place to support running your MVC application on Microsoft Azure Websites (*.azurewebsites.net). It’s the same MVC application. However, from the perspective of Azure AD, the version you run on localhost during development is an entirely different application than the one that runs in Azure. That is why you will have two applications in Azure AD after publishing.
If you were to FTP into the website or use Site Control Management (<yoursitename>.scm.azurewebsites.net) to look at the web.config file for the application in Azure, you would find that Visual Studio took care of all the details necessary to connect to the SQL Database in Azure to get the information it needs to identity your Azure AD tenant, configure Windows Identity Foundation (WIF) to validate incoming tokens, and handle the details of the underlying WS-Federation protocol.
Run the application in Azure
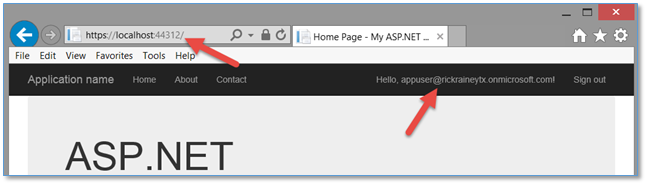
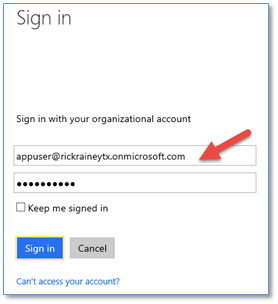
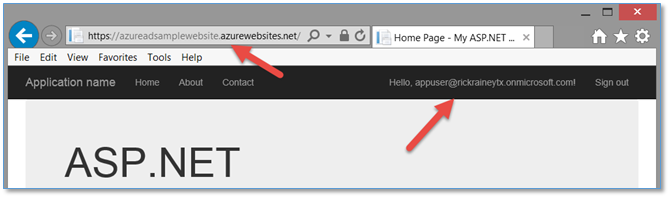
Now that the application is published, I can open a browser and navigate to the URL (https://azureadsamplewebsite.azurewebsites.net in this case). I’m immediately challenged to sign-in just as before when I was running on localhost. I’ll sign in as App User which is just a typical user in my organization’s active directory.
As expected, I’m signed in and identified as App User in my application.
Wrapping up
This blog post was strictly about the developer experience and understanding the basics of what is required to be successful when creating cloud applications that will authenticate users using Organizational Accounts in Azure Active Directory. In subsequent posts, I’ll go deeper into the automation that is happening in this scenario and talk more about the database dependency and even how you can remove it (if you want).
Cheers!
Comments powered by Disqus.