Last week Microsoft announced Traffic Manager support for Windows Azure Web Sites. This is a fantastic feature that enables you to deploy your web site to multiple data center regions, resulting in improved availability, performance (for users of your web site), maintenance capabilities, and failover support for your web site. In this post, I’ll demonstrate how to setup and configure Traffic Manager for Windows Azure Web Sites.
If you’re not already familiar with what Traffic Manager is, then check out the Traffic Manager Overview before proceeding. It’s a really simple, yet very powerful feature that will take just a few minutes to understand. If I had to sum it up in one sentence, I’d describe it as simply a global load balancer for your web site or cloud service with some built-in configuration for common load balancing methods.
WebSite Deployments
To start with, I created three web sites. One in West US, North Central US, and East US.

Traffic Manager requires that the web sites be in Standard mode so each of these were configured as such.

To simplify my sample, I also added a “Region” application setting to each web site that I reference in code (later) to show which region Traffic Manager resolved me to.


Using Visual Studio, I created a very simple ASP.NET MVC Web Application (default template) and changed the Index view to just print out the value of the “Region” application setting.

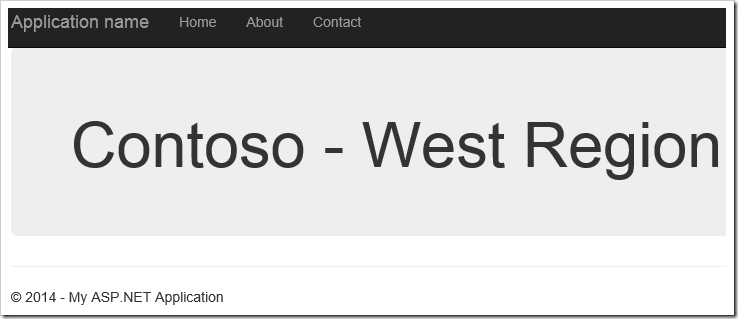
Next, I downloaded the PublishSettings file for each web site and published the MVC Web Application to each of the 3 web sites. Here is the sample output for contoso-ws-west.azurewebsites.net.
Adding Traffic Manager
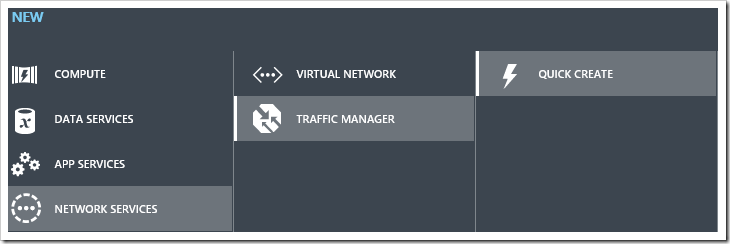
The first step here is creating a Traffic Manager profile.
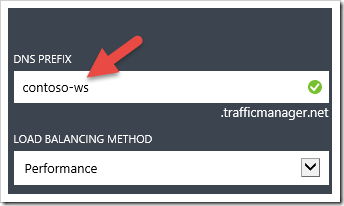
When doing so, you will need to come up with DNS prefix that is globally unique. Keeping with my web site naming convention, I chose contoso-ws.trafficmanager.net. I left the LOAD BALANCING METHOD at it’s default (Performance) which I’ll cover in more detail shortly.
Adding the endpoints to the Traffic Manager profile
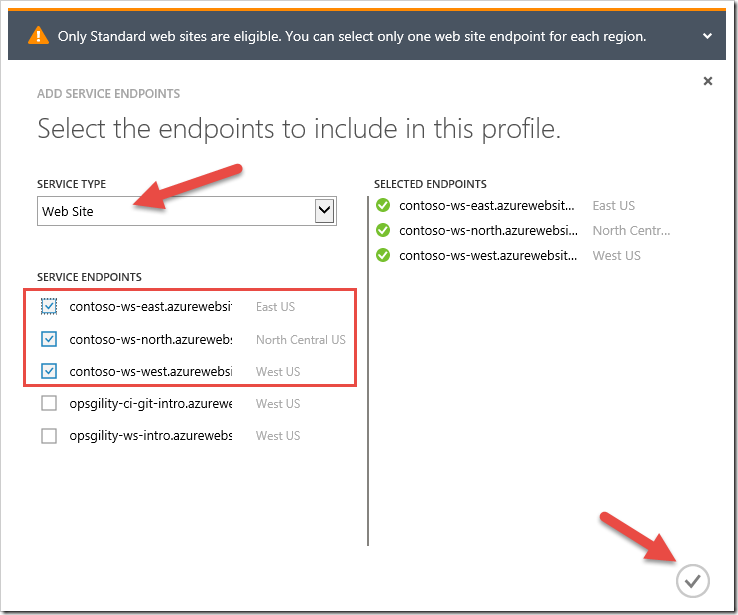
Adding the web site endpoints is just a matter of a few clicks. In the ENDPOINTS section of the Traffic Manager profile, click on the Add Endpoints link and you get a window where you can specify the SERVICE TYPE (Web Site or Cloud Service) and click the check box next to the endpoints you want added to the Traffic Manager profile.
Within a few seconds the ENDPOINTS page indicates the 3 web sites and their status. A status of Online means that Traffic Manager got a successful response (HTTP 200) the last time it issued an HTTP GET to the site, which it will do frequently from this point on. To understand the details of how Traffic Manager monitors the endpoints, check out this article.

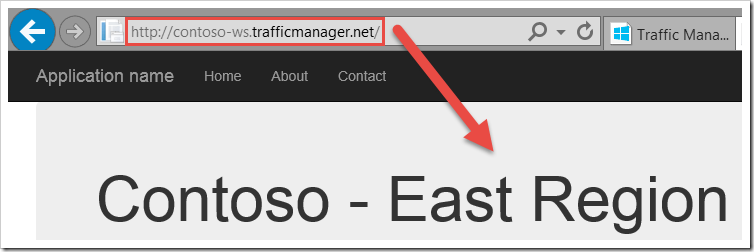
With the endpoints online, I opened a browser and navigated to contoso-ws-trafficmanger.net and as you can see by the output, it resolved me to the East region. Why East? Because currently my Traffic Manager profile is set to load balance for Performance and since I’m in Dallas, TX at the time I’m writing this, Traffic Manager has determined that this region will be faster for me than going to the West or North Central region. This could change, and in fact it did. A couple of times I got a response from North Central.
Disabling and Enabling Endpoints
On the ENDPOINTS page in the portal, an endpoint can be disabled by simply highlighting it and clicking the DISABLE link at the bottom of the screen. Notice the STATUS changes to Disabled.
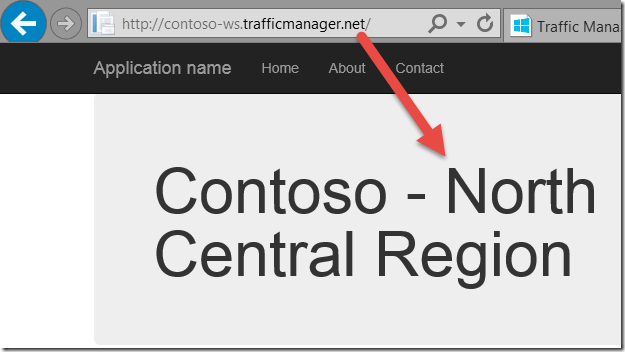
When I open a new browser window and navigate to contoso-ws-trafficmanager.net, Traffic Manager routes me to the North Central deployment since East has been disabled. NOTE: East is still running. Traffic Manager is just not taking it into consideration when resolving the request.
When I click the ENABLE link for the East location and open a new browser window, my requests start resolving back to East (most of the time).
Shutting down and starting a Web Site
If I completely shut down one of the web sites (East for example), Traffic Manager will detect this the next time it sends it’s health probe request. Notice in this case the STATUS changes to Stopped.
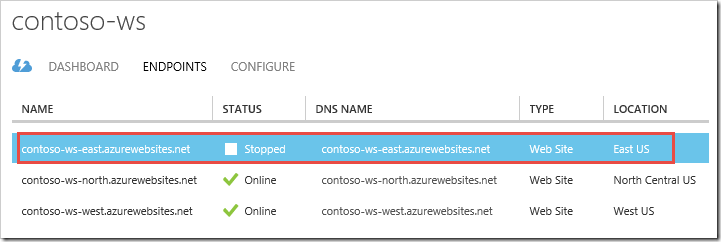
When I start the web site back up, Traffic Manager will update East to Online again because it will be getting HTTP 200 (Ok) back on it’s health probe requests.
Configuring Traffic Manager
In the CONFIGURE page, there are basically 3 groups of settings; general, load balancing method, and monitoring.

The DNS NAME is the Traffic Manager Domain and is what you would point your company domain to using a CNAME resource record. For example, in this case, if I owned contoso.com, I would add a CNAME record pointing to contoso-ws.trafficmanager.net and any requests to contoso.com would then resolve to one of my 3 web site endpoints via Traffic Manager.
The only setting you can change in this section is the DNS TTL. It defaults to 5 minutes and this defines how frequently a client will query Traffic Manager for updated DNS entries. Updates could be an endpoint being disabled, stopped, or just not functioning. Unless the client opens a new browser instance, it will continue to use the DNS entries for this period of time. Generally, you probably will want to leave this setting at 5 minutes.
Load Balancing Method
The Load Balancing Method can be either Performance, Round Robin, or Failover.
Performance Load Balancing is what I demonstrated above and simply means that depending on where a request is coming from, Traffic Manager is going to resolve to a region closest to the user (generally). So, if you’re in CA, then you would resolve to contoso-ws-west. If you’re in NC, then you would resolve to contoso-ws-east. These are general rules. As I mentioned earlier, sometimes my requests from TX resolved to contoso-ws-north, but most of the time my requests resolved to contoso-ws-east.
Round Robin Load Balancing is simply going to route requests equally across all 3 web sites. The idea here is to distribute load equally across all the deployments.
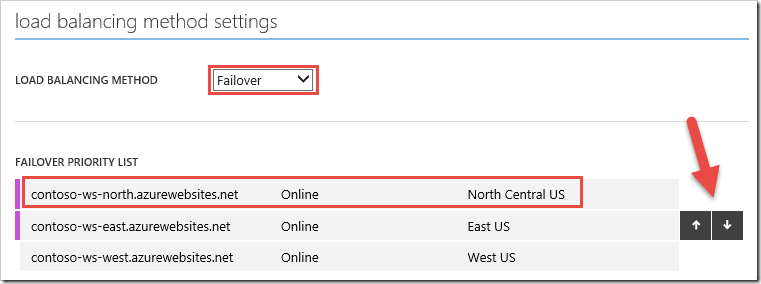
Failover Load Balancing gives you a way to specify the priority for all traffic. For example, below I have North Central first in the list (by using the up/down arrows to the right) . What this means is that the North Central deployment is my primary endpoint and all traffic will go to this endpoint. If / when that site is stopped, disabled, or not functioning, then Traffic Manager will send all traffic to the East deployment, and so on. When North Central comes back online, Traffic Manager will start resolving all traffic back to North Central.
Monitoring
In the monitoring settings, you are able to customize how Traffic Manager probes your web site endpoints to determine it’s availability for load balancing.
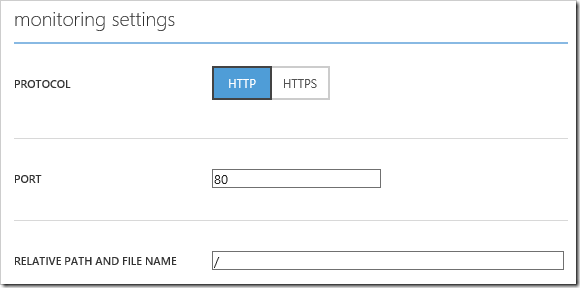
The protocol setting allows you to specify HTTP or HTTPS. This could be useful if you have a custom probe page that you use to determine the health of your web site that may return some confidential information. Telling Traffic Manager to issue the requests over HTTPS will insure that content is encrypted on the wire.
The port setting is useful in cases where you want to keep your Traffic Manager health probes separate from regular web site traffic.
The relative path and file name setting defaults to the default page for your web site. Generally this is probably not a good idea. A good practice here is instead to have a page that properly checks the health of your web site by verifying database connections, web service endpoints your web site depends on, perhaps even checking some performance counters (standard or custom). In other words, just because the default page returns successfully may not mean your web site is fully working. In which case, you don’t want Traffic Manager sending traffic to an unhealthy instance.
Summary
In this post I showed you how you can use Windows Azure Traffic Manager with Web Sites to improve availability for your site. In my next post, I’ll provide some additional guidance you should be aware of when using Traffic Manager with Windows Azure Web Sites.

Comments powered by Disqus.