
In this post, I’m going to cover some basics for using Visual Studio’s Git support with Github repositories. Specifically, I’ll cover
- Pre-Requisites (getting setup).
- Forking a Repository
- Cloning a Repository
- Committing Changes to a Local Repository
- Pushing Changes to a Remote Repository
- Submitting Pull Requests
Pre-Requisites
I’m going to be use Visual Studio 2013 Preview because it’s new and it comes pre-packaged with Git support. So, no additional downloads are needed. If you want to do the things I’m going to show in this post using Visual Studio 2012, then you will need the Visual Studio Tools for Git.
The other pre-requisite is a Github account .
Forking a Repository
Suppose you have found a Github repository that interests you and you want to make some contributions. You could ask the repository owner to give you access to the repository so you can make changes. That’s likely to be met with a firm “NO” if you get any response at all. Or, you could essentially copy the repository to a repository under your Github account where you can make all the changes you want to your own copy. That’s what forking a repository basically does. It sets up a copy in your Github account that you can work against. It also provides a way to link back to the repository you forked from so you can offer your great work back to the original repository owners for consideration (see Submitting Pull Requests below).
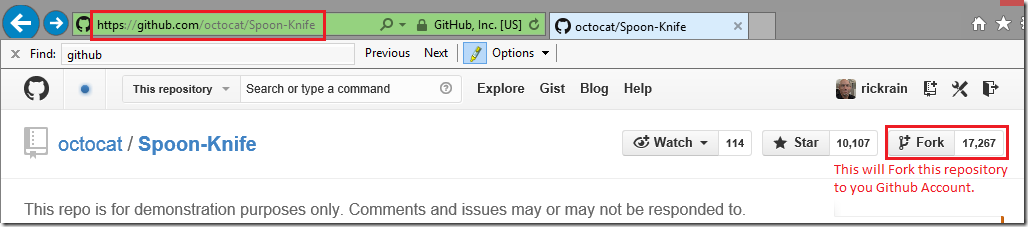
Github provides a repository called “Spoon-Knife” that is available for demonstration purposes, which I will use to demonstrate the concepts in this post. Assume I want to make some contributions to this repository. Once I’m logged into Github and have navigated to the “Spoon-Knife” repository, I can click the Fork button to fork the repository.
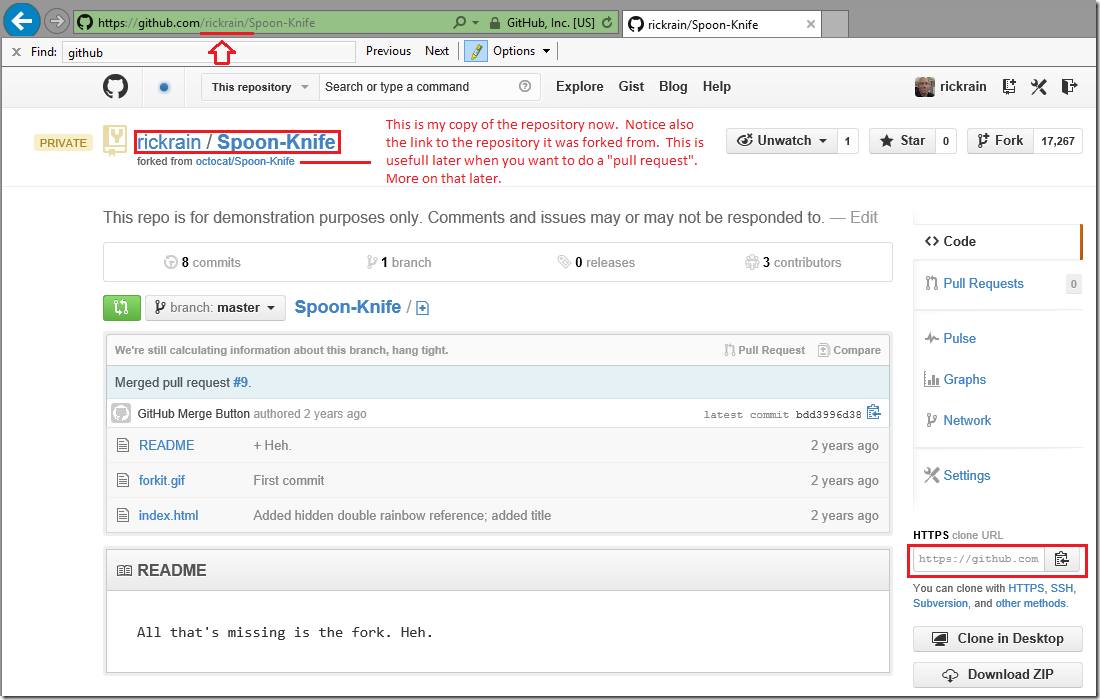
After a few seconds, I have a copy of this repository sitting in my Github account. Notice the link back to the repository I forked from at the top. Also, notice the HTTPS clone URL in the lower-right corner. This will be needed for the next section.
Cloning a Repository
To clone a repository is to get a local copy of it on your development machine. This will allow you to commit changes to the local repository in the absence of any connectivity to the remote repository on Github. This is a key difference between distributed and centralized version control systems.
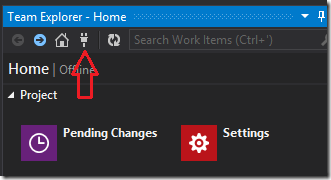
From Visual Studio’s Team Explorer, clicking on the Connect button will show the available repositories you can connect to.
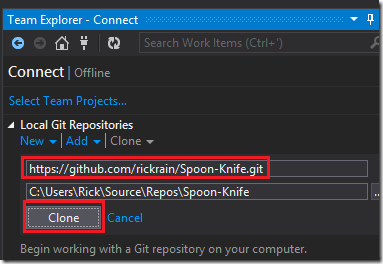
Since I’m working from a fresh install, I don’t have any repositories yet. I’ll clone the remote repository by clicking the Clone link.
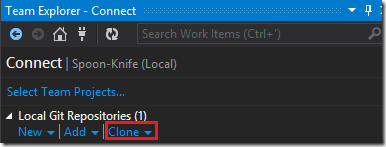
Adding the HTTPS clone URL from the remote repository to the address field and clicking the Clone button will bring a copy of the repository local.
Now, in the future, when I open Team Explorer, I’ll see this repository in my Local Git Repositories.

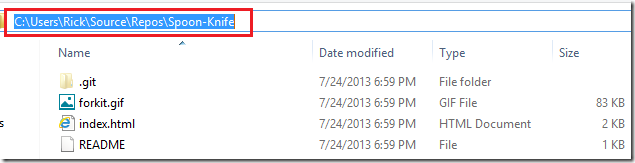
It’s not really complicated what’s happening here. If you open Windows Explorer and navigate to the folder shown above, you can see it’s simply a copy of the remote repository on Github. If you look closely, you will also see a “.git” folder. That’s where Git stores information about the local repository as you work with it. You should leave it alone. However, I wanted to call it out as an artifact of cloning the remote repository.
Committing Changes to a Local Repository
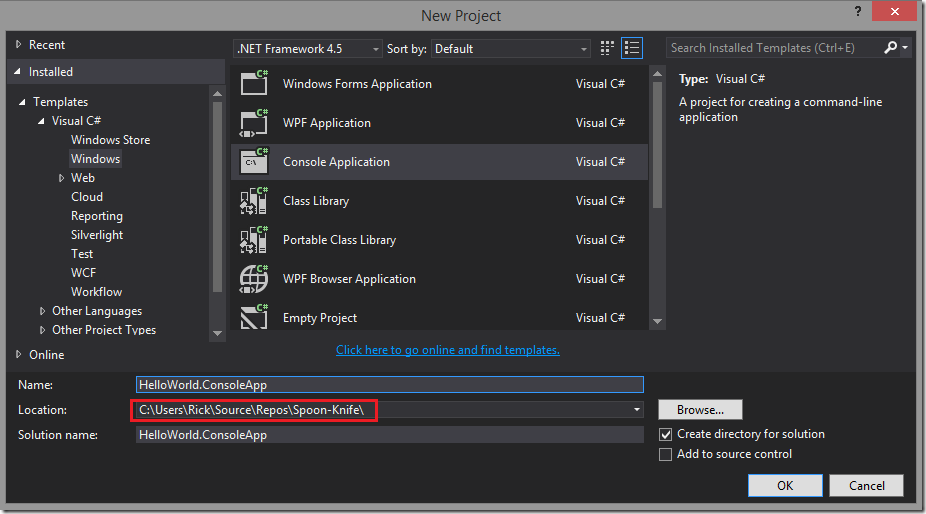
Now I’m ready to start making some contributions to this repository.Suppose I want to add a new project. I’ll start by creating a new project and setting the Location to the path of my local repository.
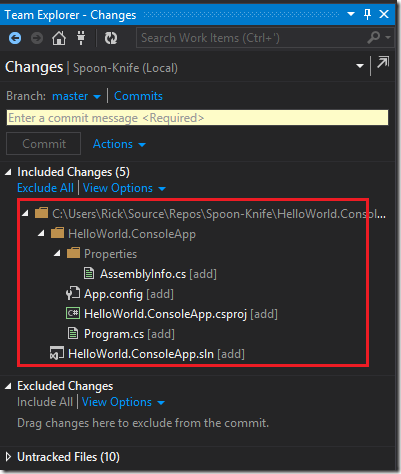
Clicking OK will create the project in the folder of my local repository. Switching over to Team Explorer and clicking on Changes …
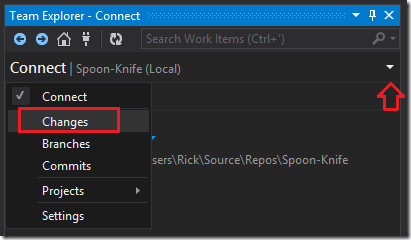
… will show all the folders and files for the project I just created as Included Changes. This doesn’t mean that the changes have been committed yet. It just means that Visual Studio and Git are aware of them and tracking the changes.
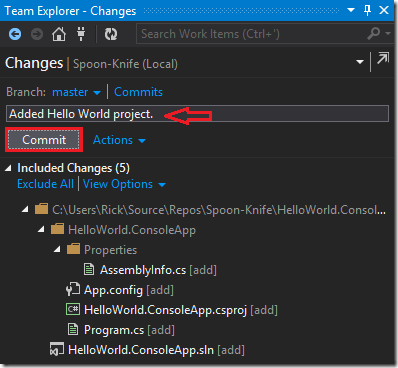
To commit the changes I need to enter a commit message and click the Commit button.
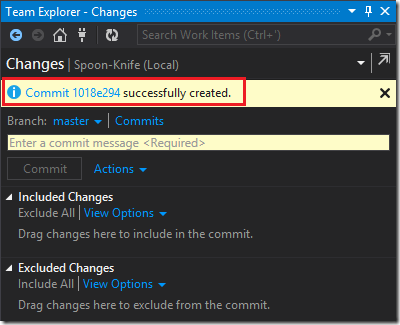
Now this is committed to my local repository. Note, this is not committed to my remote repository on Github. I’ll get to that in the next section.
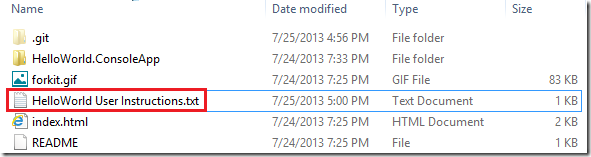
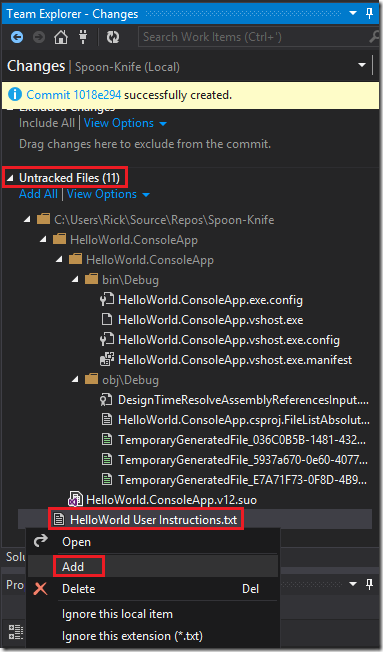
It is not necessary that changes/contributions come just from Visual Studio. For example, suppose I want to add some user instructions for the HelloWorld project. I can simply create a file in the folder of the local repository.
Now, going back to Team Explorer, I can see in the Untracked Files section that Visual Studio and Git are aware of this new file, but not tracking it. To start tracking this file, right-click on the file and select Add.
Now, this file is being tracked as a change to my local repository. However, it has still not been committed to the repository.
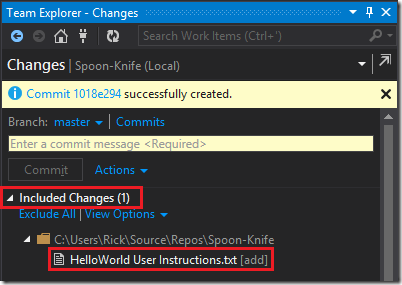
To commit this change, I’ll add a comment and click the Commit button just as I demonstrated earlier.
So far, I’ve made two commits to my local repository. I can view these commits and drill into the details for each by clicking on the Commits link.
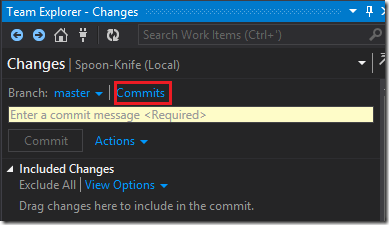
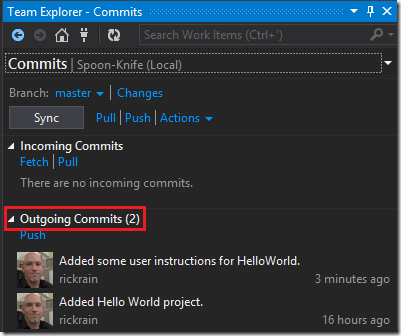
My two commits are in the Outgoing Commits section. From here, I can double-click into these commits to review the details for each.
Before I move onto the next section, I want to revisit the Untracked Files from earlier.
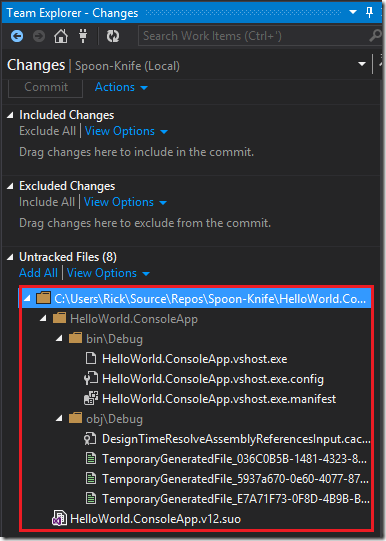
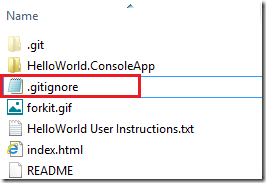
Here, the tools are rightfully assuming you don’t want to add these files to version control. Generally, you only want source code in the repository and not the compiled artifacts that land in directories like bin\Debug and obj\Debug. Nor do you want your Visual Studio user options file committed to the repository. You can tell Git to ignore these by right-clicking on the folder and selecting ignore. This will result in a .gitignore file being added to your local repository so these will be ignored going forward.
You also have the option of deleting the Untracked Files. This will physically delete the files from the repository folder on disk. However, next time you build the application, they will be recreated and show back up as Untracked Files.
Pushing Changes to a Remote Repository
Eventually you will need to get your changes in the local repository up to your remote repository on Github. That’s what a push does. When you initiate a push, your local repository is checked against the remote repository to see if any changes were added that you don’t have locally. If so, then you will need to resolve those conflicts locally before you can push to the remote repository. Since my remote repository is mine and only mine, I won’t have any conflicts. But, imagine if you were on a team with other developers, all committing changes to the same remote repository. In this case, your local repository is likely to get out of sync with the remote repository. In which case, you will need to resolve these conflicts before pushing to the remote repository.
Using Team Explorer, you can Fetch or Pull commits from the remote repository. A Fetch will return back a list of commits without applying the changes to your local repository. This gives you an opportunity to review changes from other users before proceeding. A Pull will apply the changes in the remote repository to your local repository, potentially prompting you to resolve any conflicts.
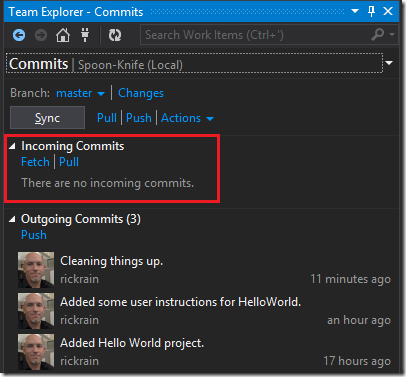
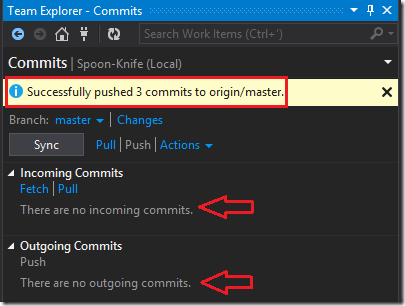
Once your local repository is in sync with the remote repository, clicking the Push link under Outgoing Commits will push your commits up to the remote repository. When the push is completed, Incoming Commits and Outgoing Commits will be empty. In other words, your local repository and remote repository are in sync.
Now, if I go back to the remote repository on Github, I can see these commits have been applied.
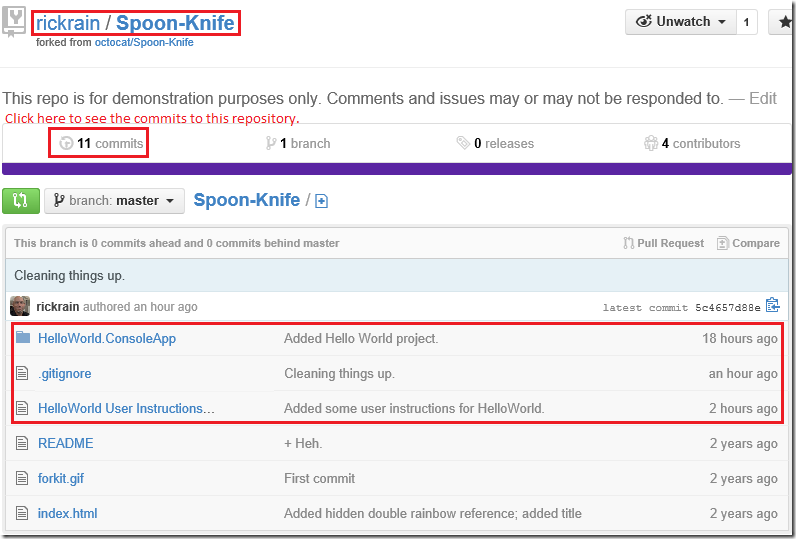
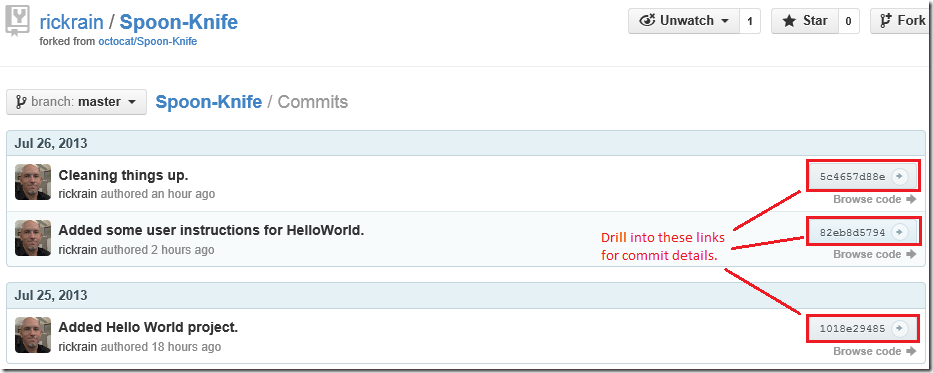
Near the top of the page is a commits link. Drilling into this will show details for the commits. In the Commits page, you can further drill into the changes to see what files were added/modified.
Submitting Pull Requests
Up until now, all the changes I’ve made have been to my local and remote repository that I forked from “octocat/Spoon-Knife” repository. Suppose now I want to offer up my great work to the owners of the “octocat/Spoon-Knife” repository. The way this is done is through a Pull Request. A pull request is a request to the original repository owner to pull my changes into the original repository. If accepted, then my changes become part of the original repository I forked from. Later, if I or someone else were to fork the “octocat/Spoon-Knife” repository, my contributions would be there.
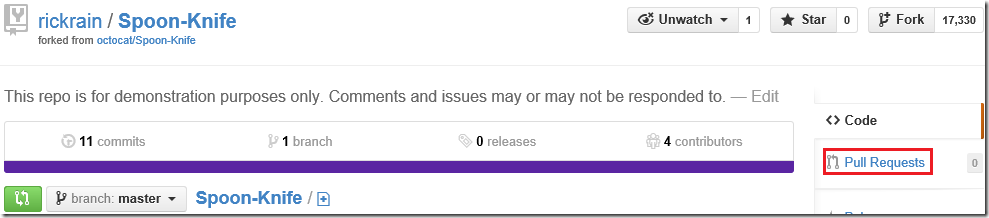
To submit a pull request, I’ll click the Pull Requests link on the right-hand side of the screen.
This takes me to a screen where I can view all my pull requests. Since I’ve not submitted one yet, I don’t have any to view. On this screen is a New pull request button I can click on to submit a new one.

This takes me to a screen that shows all the details for the pull request I’m about to submit.
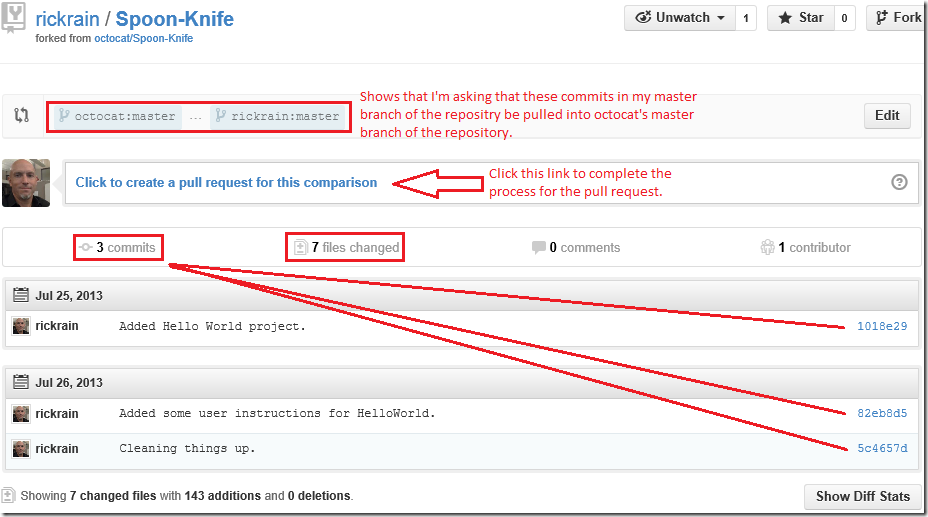
Once I confirm this is what I want to do, then I can click on the Click to create a pull request for this comparison link. This will take me to a screen where I can give a title and some brief comments for the pull request.
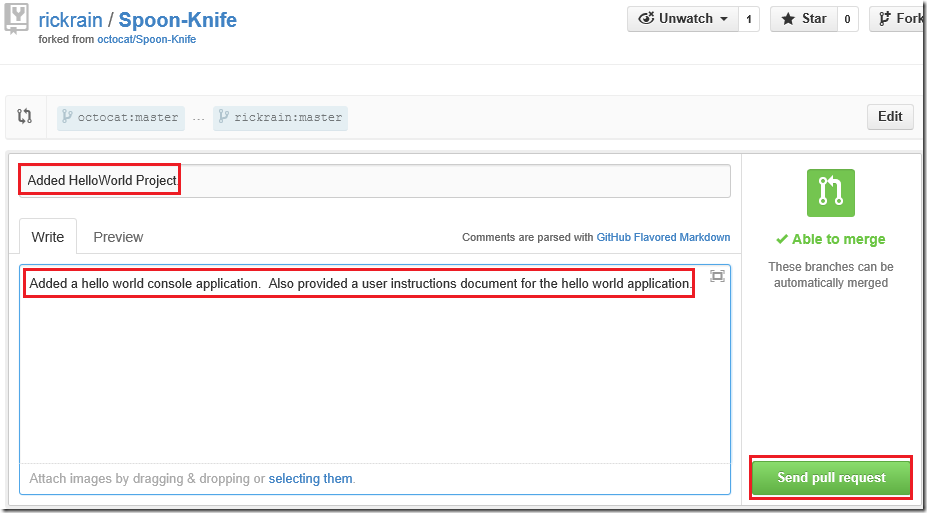
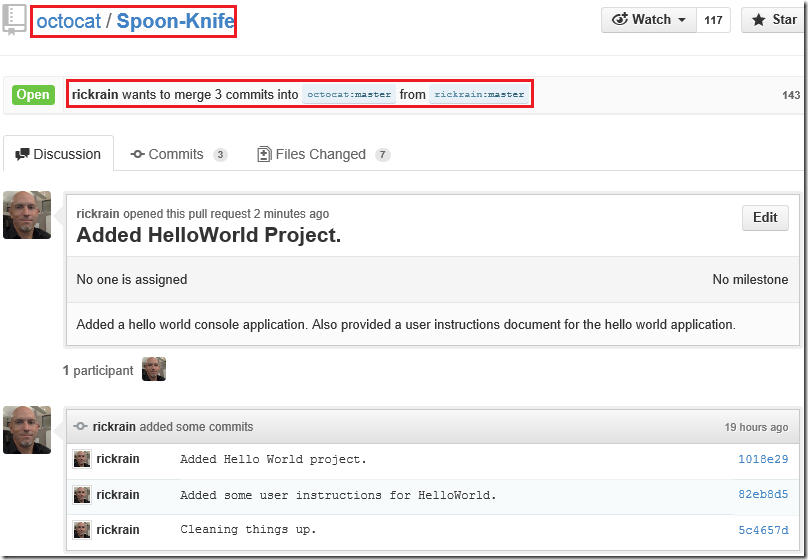
Clicking the Send pull request button will submit my pull request and take me to the original “octocat/Spoon-Knife” repository. That’s it – done! What generally will follow from here is some back-and-forth collaboration, code reviews, changes, bug fixes, etc.
Considerations Before Submitting Pull Requests
If you’re a new contributor to a repository, then you may want to spend some time reviewing the pull requests of the original repository you forked from. You can do this by going to the repository on Github.
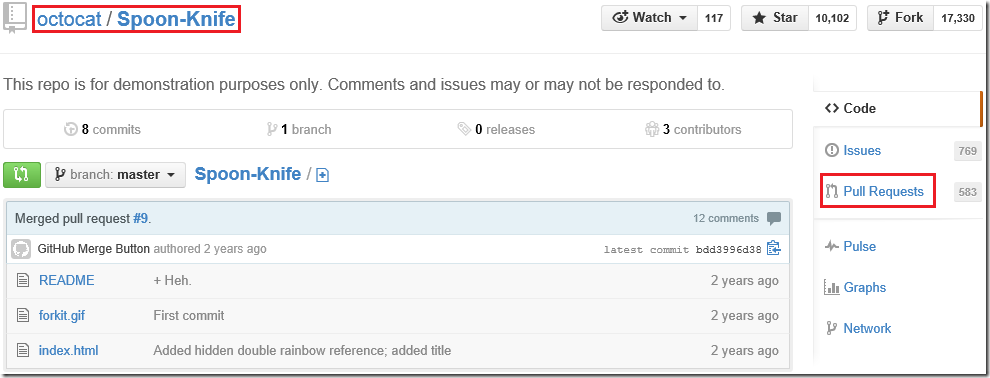
On the right-hand side of the screen is a Pull Requests link. Clicking this will take me to a screen where I can see the 583 other pull requests that people have submitted. In a real development repository, this is a good way to see who’s actively making contributions and also to observe things such as the kinds of pull requests the repository owners are accepting. This gives some insight into coding standards that may be expected. For example, if you UPPERCASE all your variable names while the repository owners prefer camelCase, then you can expect comments from the owners to change your casing before they will accept it.
Conclusion
There are many other things I’ve not touched on in this blog post, such as branching, reverting commits, etc. Perhaps I’ll talk about that in another post. This post is long enough as it is though and covers the basics – which was my goal.
There is plenty of good documentation to learn about Git, Github, and key differences between centralized and distributed version control systems. Here is a handy link that links to some additional reading on the subject.
Comments powered by Disqus.